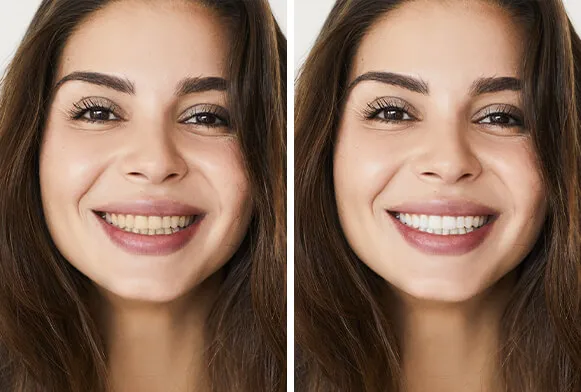
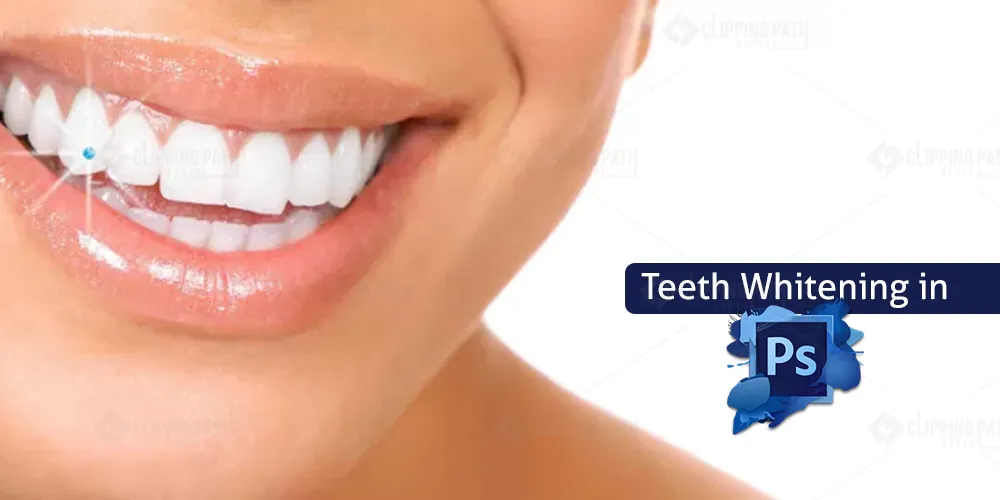
Photoshop offers powerful tools to enhance images, and teeth whitening is a popular technique for improving portraits and other photos. Achieving natural-looking results requires more than just a single click; it involves understanding the fundamentals and mastering specific techniques. This guide reveals the secrets to effectively whitening teeth in Photoshop, helping you transform dull smiles into radiant ones. Whether you are a seasoned professional or a beginner, these tips and tricks will elevate your image-editing skills and improve the quality of your work. The key to success lies in subtlety and a keen eye for detail, ensuring your enhancements look realistic rather than artificial.
Understanding Teeth Whitening in Photoshop
Before diving into the tools, it’s crucial to understand the principles behind effective teeth whitening. The goal is to brighten the teeth while preserving their natural look. Over-whitening can make the teeth appear artificial and unnatural, drawing negative attention. Begin by assessing the original image, noting the existing color, stains, and overall condition of the teeth. This assessment informs your approach, helping you determine the most appropriate techniques and levels of adjustment. The best results come from a balanced approach that takes into account the lighting, color balance, and overall aesthetic of the image. Remember, the objective is enhancement, not a complete transformation.
The Importance of Natural-Looking Results
The most significant aspect of teeth whitening in Photoshop is achieving a natural appearance. Avoid the common pitfall of making the teeth appear overly bright or uniformly white. This often results in a distracting and unrealistic look. Instead, focus on subtle enhancements, gradually brightening the teeth to match the surrounding skin tone and overall lighting of the image. Pay close attention to the highlights and shadows on the teeth, as these elements contribute significantly to their natural appearance. The goal should be to enhance the existing smile, rather than creating an artificial one. Using reference images of healthy, natural smiles can be a helpful guide.
Common Mistakes to Avoid

Several mistakes can detract from a successful teeth-whitening process. One common error is using the same level of brightness across all teeth. This creates an unnatural uniformity. Another mistake is applying too much correction at once; always make small, incremental adjustments to prevent over-whitening. Ignoring the surrounding gums and shadows can also be problematic, creating a stark contrast that appears unrealistic. Finally, failing to consider the overall color balance of the image can lead to teeth that clash with the skin tone or other elements. Always review your work closely, making small adjustments until you achieve a balanced and natural appearance. Be patient, and take your time!
Essential Photoshop Tools for Teeth Whitening
Photoshop provides a range of tools specifically designed for detailed image editing and retouching, especially useful for teeth whitening. Mastering these tools will streamline your workflow and improve the quality of your results. Familiarize yourself with the essential tools, such as the Lasso Tool, Dodge and Burn tools, and the Curves and Levels adjustments. Learning to control these tools is key to controlling how you whiten the teeth. Each tool offers unique capabilities, allowing you to apply precise adjustments and create a natural, polished finish. Experiment with different settings and techniques to find what works best for each image.
Using the Lasso Tool for Precision
The Lasso Tool is a fundamental instrument for selecting specific areas of an image, especially for detailed work like teeth whitening. With this tool, you can precisely outline each tooth, isolating it for adjustments. Start by selecting the Freeform Lasso Tool to trace the outline of each tooth carefully. Once the selection is made, you can apply adjustments to the selected area without affecting the rest of the image. Use the Feather option in the Select menu to soften the edges of your selection, creating a more natural blend with the surrounding areas. Practice with the Lasso Tool to improve your accuracy and control.
Applying the Dodge and Burn Tools

The Dodge and Burn tools are crucial for controlling the light and shadow on the teeth, helping to create a more realistic effect. The Dodge tool lightens areas, while the Burn tool darkens them. Use these tools with a soft brush and a low exposure setting to make gradual adjustments. Apply the Dodge tool to lighten the brighter areas of the teeth and the Burn tool to deepen the shadows and crevices. This technique helps retain the natural contours and texture of the teeth. Experiment with different brush sizes and exposure levels to achieve the desired effect, carefully maintaining the contrast and highlights.
Adjusting Brightness and Contrast
Adjusting the brightness and contrast of the teeth is a straightforward method for enhancing their appearance. Use the Brightness/Contrast adjustment layer to make subtle changes. Start by increasing the brightness slightly, then carefully adjusting the contrast to avoid an overly harsh look. Making these adjustments incrementally and comparing the before-and-after versions of your image can help ensure natural and balanced results. Keep an eye on the highlights and shadows. This helps create a balanced image and keeps the teeth looking natural.
Fine-Tuning with Curves and Levels
The Curves and Levels tools provide advanced control over the tonal range of the image, allowing for precise adjustments to the teeth. Curves offers more flexibility, enabling you to manipulate the highlights, mid-tones, and shadows independently. Use a gentle S-curve to brighten the teeth while maintaining the natural shadows. Levels can be used to adjust the black, gray, and white points. Small adjustments can make a big difference. These adjustments can enhance the overall appearance of the teeth by improving the color balance. Consider applying a small amount of sharpening to enhance the details.
Color Correction Techniques

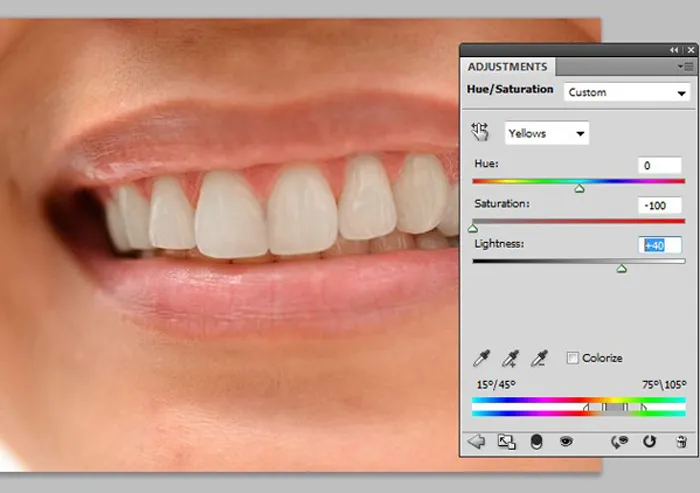
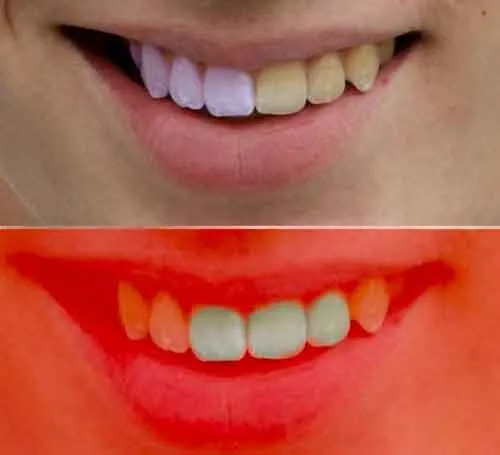
Beyond brightness and contrast, color correction is crucial for a natural appearance. Adjusting the color balance can eliminate yellow or other discolorations. Consider adjusting the overall color temperature to harmonize the teeth with the rest of the image. Correcting color imbalances is important to achieving natural results. Experimenting with the Hue/Saturation and Color Balance adjustment layers will help you achieve the desired result. Pay close attention to details and make sure that the teeth match their natural color, as well as the surrounding areas.
Matching Tooth Color to the Image
A critical step in successful teeth whitening is matching the color of the teeth to the overall color palette of the image. Use the Eyedropper tool to sample colors from other white or bright elements in the photo, such as the whites of the eyes or clothing. Applying these colors to the teeth helps blend the teeth with the overall image and reduces the appearance of artificiality. Adjust the color temperature and saturation to match the surrounding skin tones and ambient light. This ensures a cohesive and realistic look.
Avoiding Artificial Whitening
The key to successful teeth whitening in Photoshop is to avoid creating an unnatural appearance. Over-whitening is one of the most common mistakes. It’s better to make subtle adjustments and build gradually rather than applying large, abrupt changes. Regularly compare your edited version with the original image to ensure the enhancements look natural. Reviewing the highlights and shadows of the teeth will help you avoid any artificial results. Pay close attention to the details to ensure that the teeth do not clash with the surrounding skin tones. Keep the results balanced and natural.
Advanced Techniques for Complex Cases

Some images present more complex challenges. This section covers advanced techniques for dealing with difficult cases, such as heavy staining or uneven discoloration. These techniques may require more time and practice, but they will significantly improve the quality of your work. When confronted with complex cases, it is important to use these techniques carefully.
Dealing with Stains and Discoloration
For heavily stained or discolored teeth, a multi-step approach is required. Begin by using the Spot Healing Brush or Clone Stamp tool to remove visible stains. Carefully select the stained areas and use the healing brush to blend the blemishes seamlessly. Then, apply the techniques described above for brightening and color correction. Consider using the Dodge and Burn tools to refine the contrast and shadows. Always work in small, incremental steps to maintain control and avoid over-editing. Achieving the best results may require patience and experimentation. Focus on the details, and make the teeth appear bright and natural.
Retouching Gums and Surrounding Areas
Don’t overlook the importance of retouching the gums and the surrounding areas when whitening teeth. Often, the gums can appear red or inflamed. The Dodge and Burn tools are also useful for correcting and balancing the gums. You can reduce redness and create a healthier, more natural appearance. Moreover, make sure the edges of the teeth blend naturally with the gums. A little extra effort here will make the entire result appear more realistic. The contrast with the teeth should be natural and pleasing to the eye.
Post-Processing and Finishing Touches

Once you have completed the primary whitening process, there are several finishing touches to consider. These final steps can significantly enhance the quality of your work, resulting in a more polished and professional result. Final touches include minor adjustments to improve the overall image.
Exporting and Saving Your Work
Choose the correct file format and settings when exporting your work. For web use, JPEG is often a suitable choice, with a compression level that balances file size and quality. For print, consider using a TIFF or PSD format to retain the maximum amount of detail. Always keep a layered PSD file of your work to allow for future adjustments. Pay close attention to the image resolution and color profile, especially if the image will be used for print. Saving your work in the right format ensures that it retains the highest quality and will prevent artifacts. Ensure the image is ready to use, and keep a copy of the original to keep the flexibility of your work.
Best Practices for Different Image Types
Different types of images may require different approaches. For example, portraits often require more natural and subtle whitening, whereas commercial images might allow for slightly more aggressive enhancements. Adjust your techniques to match the subject, the lighting, and the overall style of the photo. Always consider the intended use of the image and adapt your approach accordingly. Consider the audience and the purpose of the final image. This will guide the results you’re looking for and ensure that your work aligns with the image requirements.
Mastering teeth whitening in Photoshop is a rewarding skill that can significantly improve the quality of your images. By understanding the tools, techniques, and best practices outlined in this guide, you can transform your images, creating beautiful and natural-looking results. Remember to practice consistently, pay attention to detail, and always strive for a natural look. With dedication, you will refine your skills and create amazing results.
